Notice
Recent Posts
Recent Comments
Link
| 일 | 월 | 화 | 수 | 목 | 금 | 토 |
|---|---|---|---|---|---|---|
| 1 | 2 | 3 | 4 | 5 | 6 | 7 |
| 8 | 9 | 10 | 11 | 12 | 13 | 14 |
| 15 | 16 | 17 | 18 | 19 | 20 | 21 |
| 22 | 23 | 24 | 25 | 26 | 27 | 28 |
Tags
- MaxHeap
- Responder chain
- 사내배포
- async
- DISPATCH
- vtable
- weak self
- swift
- Python
- ios
- BidirectionalCollection
- 입력
- 공백
- UserDefaults
- RxSwift
- URLSession
- delays deallocation
- Asnyc
- hitTest
- 전자출입
- Custom Class
- reversed
- moya
- ReactorKit
- readLine
- AVCaptureSession
- Combine
- UIResponder
- input
- binder
Archives
- Today
- Total
틈틈히 적어보는 개발 일기
[iOS][Swift] QRCode 리더, 스캐너를 만들어 보자! 본문
교내 앱센터 활동 중, 직속 부서인 전산원의 부탁으로 일반적인 QRCode 스캐너가 아닌 전자출입명부와 같은 특정 구역에서만 스캔이 가능한 스캐너를 만들 기회가 생겼습니다. 해당 앱을 제작하면서 알게되었던 지식들을 정리해보고자 합니다.
참고 자료
https://github.com/swieeft/QRCodeAndBarcodeReader
https://github.com/gaebel/scanner-overlay

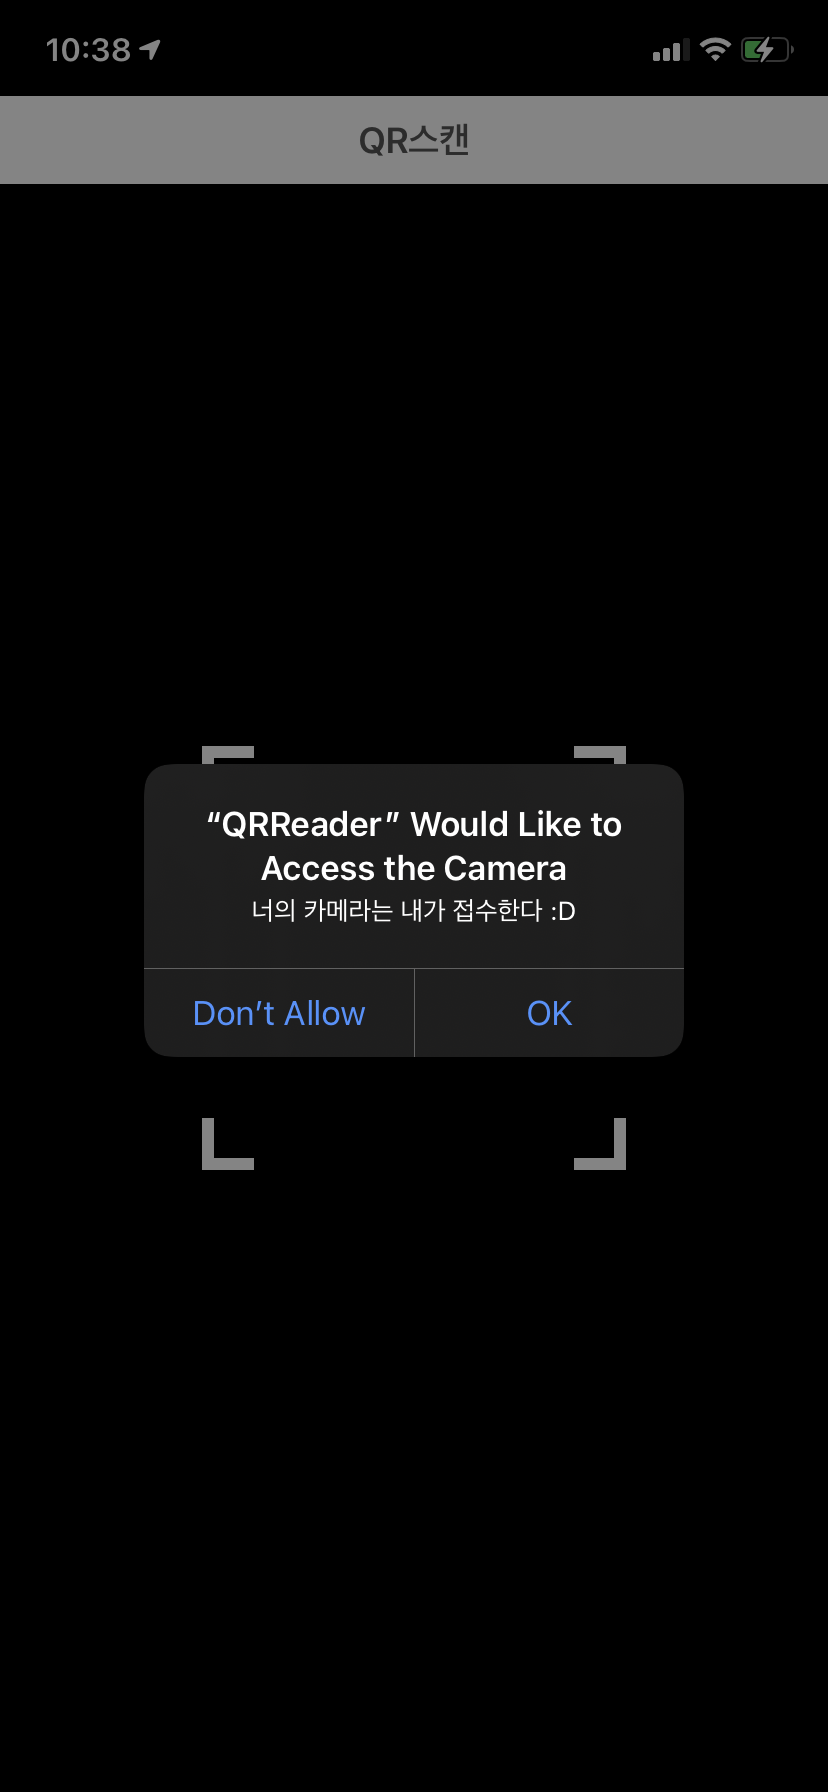
⭐️ 해당 프로젝트를 시작하기 전, 카메라 이용에 관한 권한을 반드시 획득해야합니다!
프로젝트의 Info.plist에 Privacy - Camera Usage Description 을 추가하여 앱 실행 시 권한을 요청합니다 .

작성이 되셨다면 앱 실행 시 다음과 같은 화면이 나올거에요!

먼저 QR코드를 인식하는 View를 위해 [class ReaderView: UIView]를 따로 만들어주었습니다.
이후 ViewController에 ReaderView에서 QRCode의 인식이 성공했을 때, 실패했을 때에 대한 처리를 위해 status를 enum으로 관리하고
ReaderViewDelegate를 만들어 주었습니다.
enum ReaderStatus {
    case success(_ code: String?)
    case fail
    case stop(_ isButtonTap: Bool)
}

protocol ReaderViewDelegate: class {
    func readerComplete(status: ReaderStatus)
}

// ReaderView.swift
다음으로 ReaderView를 구성하는데 단계는 총 3단계로 이루어집니다.
1. 카메라 화면을 View에 띄웁니다.
2. QRCode를 인식할 부분 이외에는 어둡게 표현하고 인식 부분에 테두리를 그립니다.
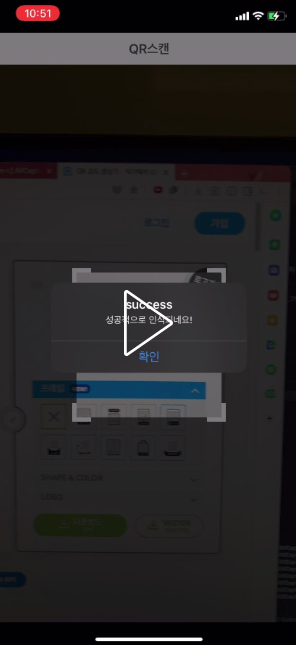
3. 인식이 되었을 때, 해당 데이터를 처리합니다.
구성 코드는 아래와 같습니다.
class ReaderView: UIView {
    weak var delegate: ReaderViewDelegate?

    // 카메라 화면을 보여줄 Layer
    var previewLayer: AVCaptureVideoPreviewLayer?
    var captureSession: AVCaptureSession?

    private var cornerLength: CGFloat = 20
    private var cornerLineWidth: CGFloat = 6
    private var rectOfInterest: CGRect {
        CGRect(x: (bounds.width / 2) - (200 / 2),
               y: (bounds.height / 2) - (200 / 2),
                          width: 200, height: 200)
    }

    var isRunning: Bool {
        guard let captureSession = self.captureSession else {
            return false
        }
        return captureSession.isRunning
    }

    // 촬영 시 어떤 데이터를 검사할건지? - QRCode
    let metadataObjectTypes: [AVMetadataObject.ObjectType] = [.qr]

    override init(frame: CGRect) {
        super.init(frame: frame)
        self.initialSetupView()
    }

    required init?(coder aDecoder: NSCoder) {
        super.init(coder: aDecoder)
        self.initialSetupView()
    }

    /// AVCaptureSession을 실행하는 화면을 구성 후 실행합니다.
    private func initialSetupView() {
        self.clipsToBounds = true
        self.captureSession = AVCaptureSession()

        guard let videoCaptureDevice = AVCaptureDevice.default(for: .video) else {return}

        let videoInput: AVCaptureInput

        do {
            videoInput = try AVCaptureDeviceInput(device: videoCaptureDevice)
        } catch let error {
            print(error.localizedDescription)
            return
        }

        guard let captureSession = self.captureSession else {
            self.fail()
            return
        }

        if captureSession.canAddInput(videoInput) {
            captureSession.addInput(videoInput)
        } else {
            self.fail()
            return
        }

        let metadataOutput = AVCaptureMetadataOutput()

        if captureSession.canAddOutput(metadataOutput) {
            captureSession.addOutput(metadataOutput)

            metadataOutput.setMetadataObjectsDelegate(self, queue: DispatchQueue.main)
            metadataOutput.metadataObjectTypes = self.metadataObjectTypes

        } else {
            self.fail()
            return
        }

        self.setPreviewLayer()
        self.setFocusZoneCornerLayer()
        /*
         // QRCode 인식 범위 설정하기
         metadataOutput.rectOfInterest 는 AVCaptureSession에서 CGRect 크기만큼 인식 구역으로 지정합니다.
         !! 단 해당 값은 먼저 AVCaptureSession를 running 상태로 만든 후 지정해주어야 정상적으로 작동합니다 !!
         */
        self.start()
        metadataOutput.rectOfInterest = previewLayer!.metadataOutputRectConverted(fromLayerRect: rectOfInterest)
    }

    /// 중앙에 사각형의 Focus Zone Layer을 설정합니다.
    private func setPreviewLayer() {
        let readingRect = rectOfInterest

        guard let captureSession = self.captureSession else {
            return
        }

        /*
         AVCaptureVideoPreviewLayer를 구성.
         */
        let previewLayer = AVCaptureVideoPreviewLayer(session: captureSession)
        previewLayer.videoGravity = AVLayerVideoGravity.resizeAspectFill
        previewLayer.frame = self.layer.bounds

        // MARK: - Scan Focus Mask
        /*
         Scan 할 사각형(Focus Zone)을 구성하고 해당 자리만 dimmed 처리를 하지 않음.
         */
        /*
         CAShapeLayer에서 어떠한 모양(다각형, 폴리곤 등의 도형)을 그리고자 할 때 CGPath를 사용한다.
         즉 previewLayer에다가 ShapeLayer를 그리는데
         ShapeLayer의 모양이 [1. bounds 크기의 사각형, 2. readingRect 크기의 사각형]
         두개가 그려져 있는 것이다.
         */
        let path = CGMutablePath()
        path.addRect(bounds)
        path.addRect(readingRect)

        /*
         그럼 Path(경로? 모양?)은 그렸으니 Layer의 특징을 정하고 추가해보자.
         먼저 CAShapeLayer의 path를 위에 지정한 path로 설정해주고,
         QRReader에서 백그라운드 색이 dimmed 처리가 되어야 하므로 layer의 투명도를 0.6 정도로 설정한다.
         단 여기서 QRCode를 읽을 부분은 dimmed 처리가 되어 있으면 안 된다.
         이럴때 fillRule에서 evenOdd를 지정해주는데
         Path(도형)이 겹치는 부분(여기서는 readingRect, QRCode 읽는 부분)은 fillColor의 영향을 받지 않는다
         */
        let maskLayer = CAShapeLayer()
        maskLayer.path = path
        maskLayer.fillColor = UIColor(displayP3Red: 0, green: 0, blue: 0, alpha: 0.6).cgColor
        maskLayer.fillRule = .evenOdd

        previewLayer.addSublayer(maskLayer)


        self.layer.addSublayer(previewLayer)
        self.previewLayer = previewLayer
    }

    // MARK: - Focus Edge Layer
    /// Focus Zone의 모서리에 테두리 Layer을 씌웁니다.
    private func setFocusZoneCornerLayer() {
        var cornerRadius = previewLayer?.cornerRadius ?? CALayer().cornerRadius
        if cornerRadius > cornerLength { cornerRadius = cornerLength }
        if cornerLength > rectOfInterest.width / 2 { cornerLength = rectOfInterest.width / 2 }

        // Focus Zone의 각 모서리 point
        let upperLeftPoint = CGPoint(x: rectOfInterest.minX - cornerLineWidth / 2, y: rectOfInterest.minY - cornerLineWidth / 2)
        let upperRightPoint = CGPoint(x: rectOfInterest.maxX + cornerLineWidth / 2, y: rectOfInterest.minY - cornerLineWidth / 2)
        let lowerRightPoint = CGPoint(x: rectOfInterest.maxX + cornerLineWidth / 2, y: rectOfInterest.maxY + cornerLineWidth / 2)
        let lowerLeftPoint = CGPoint(x: rectOfInterest.minX - cornerLineWidth / 2, y: rectOfInterest.maxY + cornerLineWidth / 2)

        // 각 모서리를 중심으로 한 Edge를 그림.
        let upperLeftCorner = UIBezierPath()
        upperLeftCorner.move(to: upperLeftPoint.offsetBy(dx: 0, dy: cornerLength))
        upperLeftCorner.addArc(withCenter: upperLeftPoint.offsetBy(dx: cornerRadius, dy: cornerRadius), radius: cornerRadius, startAngle: .pi, endAngle: 3 * .pi / 2, clockwise: true)
        upperLeftCorner.addLine(to: upperLeftPoint.offsetBy(dx: cornerLength, dy: 0))

        let upperRightCorner = UIBezierPath()
        upperRightCorner.move(to: upperRightPoint.offsetBy(dx: -cornerLength, dy: 0))
        upperRightCorner.addArc(withCenter: upperRightPoint.offsetBy(dx: -cornerRadius, dy: cornerRadius),
                              radius: cornerRadius, startAngle: 3 * .pi / 2, endAngle: 0, clockwise: true)
        upperRightCorner.addLine(to: upperRightPoint.offsetBy(dx: 0, dy: cornerLength))

        let lowerRightCorner = UIBezierPath()
        lowerRightCorner.move(to: lowerRightPoint.offsetBy(dx: 0, dy: -cornerLength))
        lowerRightCorner.addArc(withCenter: lowerRightPoint.offsetBy(dx: -cornerRadius, dy: -cornerRadius),
                                 radius: cornerRadius, startAngle: 0, endAngle: .pi / 2, clockwise: true)
        lowerRightCorner.addLine(to: lowerRightPoint.offsetBy(dx: -cornerLength, dy: 0))

        let bottomLeftCorner = UIBezierPath()
        bottomLeftCorner.move(to: lowerLeftPoint.offsetBy(dx: cornerLength, dy: 0))
        bottomLeftCorner.addArc(withCenter: lowerLeftPoint.offsetBy(dx: cornerRadius, dy: -cornerRadius),
                                radius: cornerRadius, startAngle: .pi / 2, endAngle: .pi, clockwise: true)
        bottomLeftCorner.addLine(to: lowerLeftPoint.offsetBy(dx: 0, dy: -cornerLength))

        // 그려진 UIBezierPath를 묶어서 CAShapeLayer에 path를 추가 후 화면에 추가.
        let combinedPath = CGMutablePath()
        combinedPath.addPath(upperLeftCorner.cgPath)
        combinedPath.addPath(upperRightCorner.cgPath)
        combinedPath.addPath(lowerRightCorner.cgPath)
        combinedPath.addPath(bottomLeftCorner.cgPath)

        let shapeLayer = CAShapeLayer()
        shapeLayer.path = combinedPath
        shapeLayer.strokeColor = UIColor.white.cgColor
        shapeLayer.fillColor = UIColor.clear.cgColor
        shapeLayer.lineWidth = cornerLineWidth
        shapeLayer.lineCap = .square

        self.previewLayer!.addSublayer(shapeLayer)
    }
}

// MARK: - ReaderView Running Method
extension ReaderView {
    func start() {
        print("# AVCaptureSession Start Running")
        self.captureSession?.startRunning()
    }

    func stop(isButtonTap: Bool) {
        self.captureSession?.stopRunning()

        self.delegate?.readerComplete(status: .stop(isButtonTap))
    }

    func fail() {
        self.delegate?.readerComplete(status: .fail)
        self.captureSession = nil
    }

    func found(code: String) {
        self.delegate?.readerComplete(status: .success(code))
    }
}

// MARK: - AVCapture Output
extension ReaderView: AVCaptureMetadataOutputObjectsDelegate {
    func metadataOutput(_ output: AVCaptureMetadataOutput, didOutput metadataObjects: [AVMetadataObject], from connection: AVCaptureConnection) {

        print("# GET metadataOutput")
//        stop(isButtonTap: false)

        if let metadataObject = metadataObjects.first {
            guard let readableObject = metadataObject as? AVMetadataMachineReadableCodeObject,
                let stringValue = readableObject.stringValue else {
                return
            }

            AudioServicesPlaySystemSound(SystemSoundID(kSystemSoundID_Vibrate))
//            AudioServicesPlayAlertSound(SystemSoundID(1407)) // Appstore purchase sound
            found(code: stringValue)
            print("## Found metadata Value\n + \(stringValue)\n")
            stop(isButtonTap: true)
        }
    }
}

internal extension CGPoint {

    // MARK: - CGPoint+offsetBy
    func offsetBy(dx: CGFloat, dy: CGFloat) -> CGPoint {
        var point = self
        point.x += dx
        point.y += dy
        return point
    }
}
'📱 iOS, Swift' 카테고리의 다른 글
| [iOS][Swift] Responder Chain, hitTest, point (hitTest, point의 호출 로직) (1) | 2022.03.06 |
|---|---|
| [iOS][Swift] Final 키워드에 관한 문법적 의미와 성능적 관점 (1) | 2022.01.24 |
| [iOS][Swift] 커스텀 클래스를 UserDefaults에 저장해보기, Singleton 패턴 적용하기 (0) | 2021.01.05 |
| [iOS][Swift] Ad-Hoc, In-House 배포와 관련된 이슈 정리 (0) | 2020.06.08 |
| [iOS][Swift] View Animation 구현하기 (0) | 2020.06.08 |
Comments


